HONEY CRACKED WHEAT BREAD and SUZANNE CORBETT

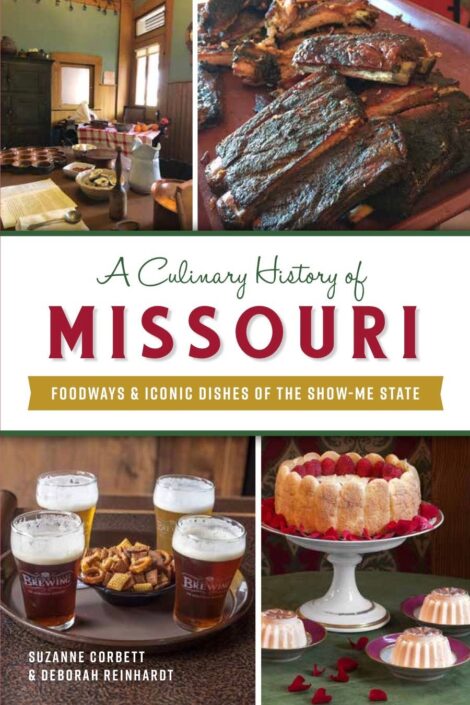
Glory be! Suzanne Corbett just launched a new book. A Culinary History of Missouri: Foodways & Iconic Dishes from the Show-Me State, co-written with fellow food and travel writer Deborah Reinhart, promises to excite everyone interested in food, history, Missouri and recipes.

Book cover of A Culinary History of Missouri

Suzanne declares a passion for “food history and anything that fills a plate or glass” and has shared this love in such a reader-rewarding manner throughout her long career that we wanted to know more about her. So we asked and she replied:

Q: Tell us a bit about your personal background? I know you studied dance and drama, but turned that interest into food and culinary history. Can you outline the path from one to the other?

A: I was born and raised in South St. Louis County on a truck farm with tomatoes the cash crop. (The reason why I don’t eat tomatoes today.) My mother always encouraged me to thrive and pursue my dreams, which in my youth was dance and drama. I’m sure my past theatrical dreams explain why I embraced cooking, teaching and living history work—all things I can perform in.

Q: When did you first become interested in cooking and food history?

A: I learned to cook as a young child watching my mother and grandfather, picking up skills now considered oldways – foodways, such as open kettle canning and baking and cooking techniques of the late 19th and early 20th century. I embraced the ways of the past. A past that was served to me on the table.

Q: When did start cooking professionally?

A:  As many women who need to make a living or monetary contribution to the household, I started cooking for others. I ran a catering business and decorated cakes. I also worked for various candy stores decorating sugar molded confections and creating panoramic easter eggs.

I started teaching at Community education classes back in 1976 after I took a class, returning home to complain that I could have taught it better. My husband, Jim, said, “then go do it.”  I did, teaching at various cooking schools throughout the St. Louis area from then on.

Q: How did the culinary history aspect come into play?

A:  One of my cooking students, a curator at Jefferson Barracks Historic Site, asked if I could come up with a food demo/program for an upcoming Civil war weekend and come in costume. I went to that first event as a bread baker—baking historic breads—then called “old-fashioned” bread not “artisan” breads as they do today. I soon became known as the St. Louis Bread Lady, baking in open hearths, wood burning iron stoves and over firepits. This first event launched my pursuits as a food historian/foodways interpreter where I work to discover, preserve and share stories that connect us to our past through the table. Stories that define who and what we were and are via the food we eat.

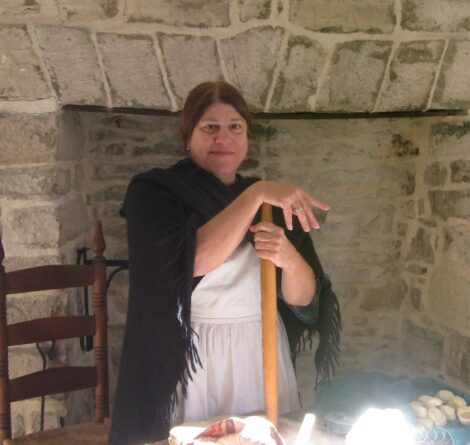
Suzanne Corbett in Costume

Q: You’ve worn so many titles in your professional life that you think of yourself as a phoenix—albeit one with “singed wings.” You’ve been a successful teacher, writer, historian, preservationist, author and, lately, a media producer, winning prizes for video production. How do you tie the different facets of your professional life together?

A: While those titles may seem disjointed, they’re not. The connective thread has always been food. Food and history are my passions, which defines not only my career, but feeds my soul.

Q: In addition to the remarkable Culinary History of Missouri, you’ve authored a variety of books. Can you tell us a tidbit about a few and how to order?

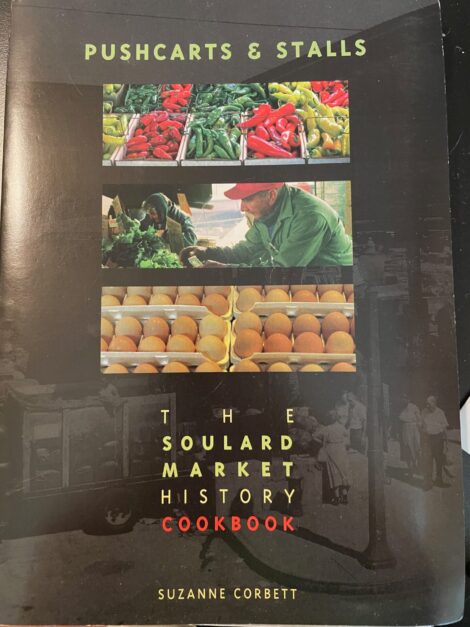
A: A Culinary History of Missouri: Foodways & Iconic Dishes form the Show-me State is only a small taste of Missouri’s foodways. A history that is always being discovered and made with each passing year. Pushcarts and Stalls: The Soulard Market Cookbook, the first book of which I was credited as author and not a contributor, is a collection of turn of the 20th century recipes reflecting the famers and vendors who worked and sold their wares and produce at Soulard, another story that is changing over its nearly 200-hundred-year history.

Cover of Suzanne Corbett's Pushcarts and Stalls.

Both books are available on Amazon.com with A Culinary History of Missouri also available at Arcadia Publishing.

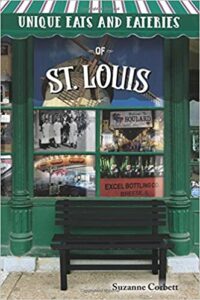
Cover of Unique Eats and Eateries


Unique Eats and Eateries is a collection of my personal picks of what I considered the quintessential St. Louis restaurants. Each included restaurant has a great story and, of course, great food and drink. Copies can be ordered at ReedyPress.com.


Copies of The Gilded Table: Recipes and Table History from the Campbell House, a book that spotlights the food, culinary traditions and social decorum of 19th century America through the private home and social life of Robert and Virginia Campbell, one of Missouri’s wealthiest couples, is available through the Campbell House Museum’s website.

Suzanne holding a copy of The Gilded Table


Q: Considering the vast number of recipes that you have tested, developed, prepared, published, photographed and taught, do you have one single favorite that you would share with us?

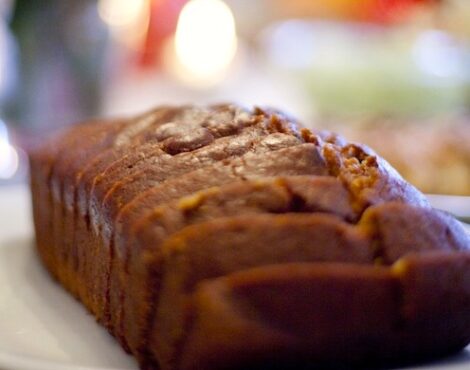
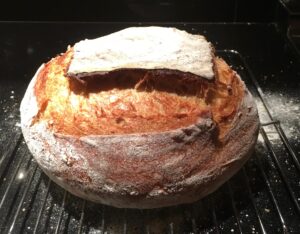
A: Wow, that’s tough for any cook, gourmet/foodie/gourmand. That said, considering how my career began and my historical work, I would have to say Honey Wheat Bread and its variations is a favorite. After all, I was the Bread Lady.

HONEY CRACKED WHEAT BREAD

(Recipe provided by Suzanne Corbett)

Yield: 2 loaves.

2 cups stone ground whole-wheat flourHoney Wheat Bread

1/2 cup cracked wheat

2 packets (1/4 ounce each) active dry yeast (1/2 cup sourdough starter can also be used)

2 cups warm water

1 tablespoon kosher salt

1/2 cup wildflower honey

1/2 cup melted butter

2 to 3 cups all-purpose flour

Shortening to grease pans and bowls

Put whole-wheat flour, cracked wheat and yeast in a large mixing bowl. Stir in water and salt. Add in honey and butter. Stir in enough flour to make a stiff dough. Turn out on a floured surfaced and knead until smooth. Place in a lightly buttered bowl, cover and allow to rise until doubled in bulk.

Punch down dough, divide in half and shape into two round loaves.

Place loaves on a greased baking sheet and allow raise once more.

Bake in a preheated 375°F degrees for 35 minutes, or until dough sounds hollow when tapped on bottom (or when bread registers 190 degrees).

Suzanne, The Bread Lady


DOSA AND MAYURA INDIAN RESTAURANT

Padmini and Aniyan

Padmini and Aniyan

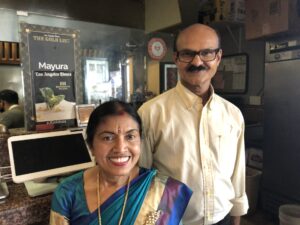
Dr. Aniyan, or Padmini as her friends call her, greets guests at the door of her south Indian restaurant with a smile as brilliant as the gold trimmed sari that she explains is her “work” uniform. The Ph.D professor of business management and accounting and her restauranteur husband, Aniyan Puthanpurayil, immigrated to the United States from Kerala, India, in 2003. Two months later, Padmini sister, Sathi, joined the couple. 

When the immigrants went looking for a business model to support their new life, it was only natural to settle on a restaurant as Padmini’s parents owned a restaurant in Kerala where Sathi cooked and Aniyan and his parents were also in the restaurant business. 

In 2006, the husband wife team opened Mayura Indian Restaurant in the heart of Culver City, California, with Sathi in the role of chef.
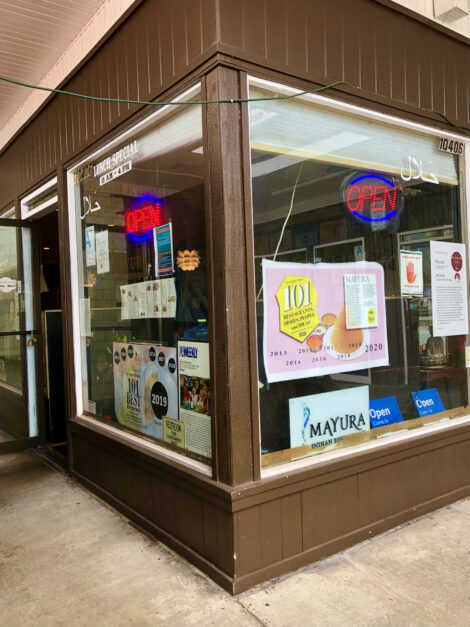
Storefront doorway to Mayura

“We chose the name because Mayura is a Sanskrit word meaning peacock,” explained Padmini, “and peacocks symbolize grace and elegance.”

Shrine in Mayura with Buddah, candles and peacock feather.

Shrine with peacock feather inside Mayura.

Early on, Mayura caught the eye of Jonathan Gold, famed restaurant critic of the Los Angeles Times and LA Weekly. Gold became an ardent fan, featuring the restaurant in many articles and spreading it’s fame. Today, a long wall above the buffet displays multiple awards earned through the years as well as photos of guests from around the world—including Abdul Kalam the former president of India.
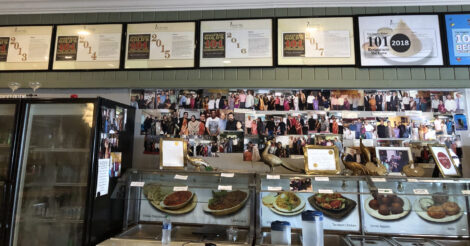
Wall of awards and photos inside Mayura

Mayura serves traditional and authentic, vegetarian and non-vegetarian home-style specialities of Kerala. 

Detail of wall hanging in MayuraA tiny state, Kerala sits on a slender strip of land tucked in between the Arabian Sea and Western Ghats in the southwestern tip of India. Culinary spices that include the famous Malabar black pepper, cinnamon, cardamom and cloves grow in such rich abundance as to support a thousand-year-old spice trade, elevating Kerala to a multi-cultured, cosmopolitan center known for its cuisine.

“Southern Indian cooking differs from northern Indian food in its spicing,” Padmini said, “North Indian food is spicy in the sense of “hot.” The foods of Kerala rely on a complex combination of spices that produce a subtle,  unique and special flavor.” 

“We want to make sure we cook with love, serve with love and live with love,” says Padmini. “We believe in karma and want to do the best for the community.”

Judging by the restaurant’s popularity, the community returns Mayura’s love, especially for the Kerala menu specialties that include several different varieties of dosa.
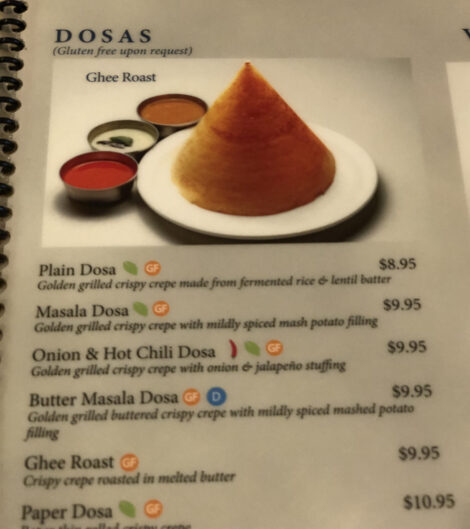
Dosa from Mayura's Menu

Originating in southern India in the 5th century AD, dosas are crepe-like goodies that cooks usually make from a simple fermented batter of lentils and rice. Eaten warm, served in crispy cones, in flat disks, plain or rolled or folded around flavorful fillings, dosas delight diners at breakfast, for snacks or as a special part of an elaborate meal.

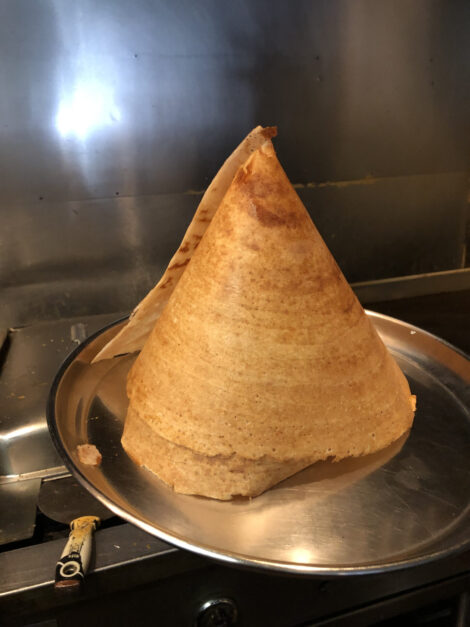
The following recipe is fashioned after Mayura’s Gee Roast Dosa, a delectable, golden-grilled, paper-thin, crisp cone-shaped masterpiece.

Although the restaurant cooks this spectacular dosa on a large, flat surface, spreading a circle as big as a super-sized frisbee to make towering cones, the size of home-made version will depend on the size of home cook’s skillet.

The recipe may look daunting, but it is actually easy. Really. See for yourself:

DOSA
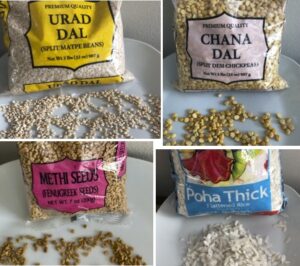
Packages of ingredientsYield: 6 to 12 depending on size.

1/2 cup urad dal (skinned, split black lentils)

2 tablespoons chana dal (split and polished yellow lentil)

1/2 teaspoon methi seed (fenugreek seed)

1-1/2 cups raw rice

2 tablespoons poha (par-boiled and flattened rice)

Non-iodized rock salt or sea salt

Oil, butter or ghee 

Put dals and methi seed in a strainer and rinse with cold water until water runs clear. Transfer dal mixture to a large bowl, add water to cover by several inches and set aside to soak for 4 to 5 hours.

Put rice in a strainer and rinse with cold water until the water runs clear. Transfer rice to a large bowl add water to cover by several inches and set aside to soak for 4 to 5 hours. 

After dals and rice have soaked and before blending, rinse the poha and put it in a small bowl with 1/4 cup water, stir to mix and set aside for 30 minutes.

Put soaked poha in a blender jar. Drain dal mixture and add to blender along with 1/2 teaspoon salt and 3/4 cup water. Blend until very smooth, adding more water if necessary to make a frothy, thick batter of pouring consistency. Transfer batter to a large bowl.

Drain rice and put in blender jar with 1/2 or a little more water.  Blend until mixture is very smooth. 

Add rice batter to dal batter and mix well (some people say mixing with your hands adds warmth to start the fermenting process). The mixture should be thick, but of pouring consistence; if too thick to pour, thin with a little water. 

To ferment batter: cover bowl and set in a warm place until batter increases in volume and turns light and bubbly. Fermentation takes from 8 hours to overnight depending on room temperature. Warm is quickest. (Batter placed in an oven that had been preheated at lowest temperature for 10 minutes then turned off, with oven light kept on and door closed, takes 8 to 15 hours to ferment.)
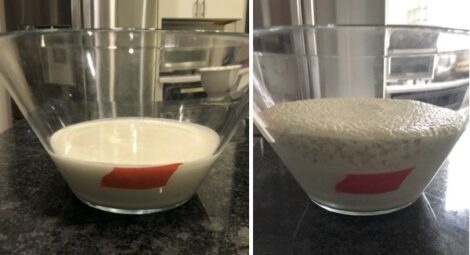
Before and after dosa batter ferments

Before and after fermentation.

Do not over ferment. Test readiness by dropping 1/2 tablespoonful of fermented batter into a bowl of water; the batter will float—not sink—if ready. Once fermented, you can refrigerate batter up to 3 days until ready to cook.

When ready to cook, transfer some of the batter to a mixing bowl. Thin to a pourable consistence with a little water. Add a tiny bit of oil, butter or ghee to a seasoned cast-iron skillet and rub well with a paper towel until the fat is absorbed. (Can use a heavy-bottom non-stick skillet without oiling.) Set the skillet over medium high heat, using the largest burner so heat reaches edges of pan and crepe cooks evenly. When the skillet is hot, turn heat to medium, stir batter and pour a spoonful in center of pan. Immediately spread the batter in a clockwise circle over bottom of skillet to make a thin circle. 
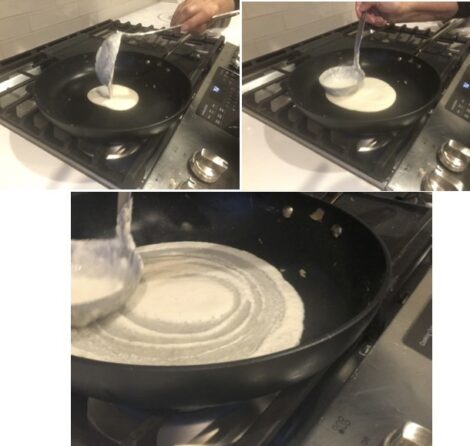
Cooking Dosa in a skillet

Add 1/4 to 1/2 teaspoon oil, butter or ghee around edges of crepe and let crepe cook until edges start to lift from pan and underside is browned. Lift from pan and roll or fold for serving. (If batter sticks to the pan, the batter was too thick or pan too hot. Adjust batter consistency with a little water or reduce heat before cooking more.) 
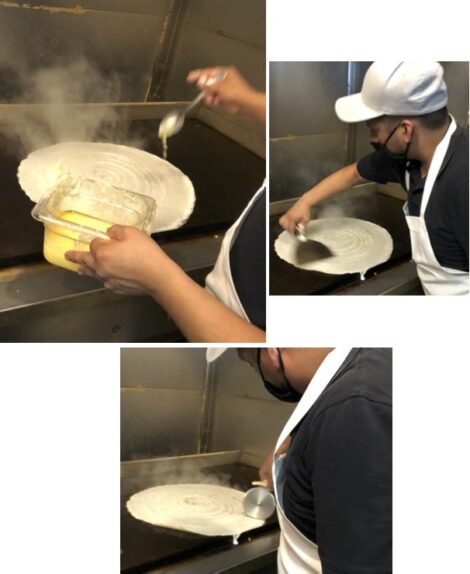
Collage of chef at Mayura making Dosa

To curl into a cone, with a sharp knife, cut crepe from center to one edge. Lift the crepe at edge of one side of the cut and roll it to the other side. 
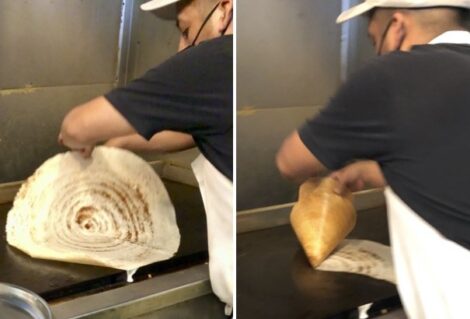
Rolling dosa into a cone


Cone-shaped dosa.

For more information on Mayura, click HERE.


EDOBOX MODERN JAPANESE RESTAURANT, SANTA MONICA, CA

Scott Manlin

Disclaimer: Scott Manlin is my nephew. As far as I can remember, he has always appreciated fine food and good restaurants. When he was barely an adult and living in Chicago, and I was a James Beard Foundation restaurant judge and couldn’t get to all of the nominated Chicago restaurants, I asked Scott for advice. His picks usually turned up top James Beard winners. Today Scott is still picking winners, but in a different role. This time as managing partner of Meiso Hospitality—a group of three (Scott, Sky Strouth and the talented chef Makoto Okuwa) who created Edobox, my new favorite restaurant in Santa Monica, CA.

Edobox Logo

Let me tell you what I adore about Edobox:

Let’s start with the CONCEPT. 

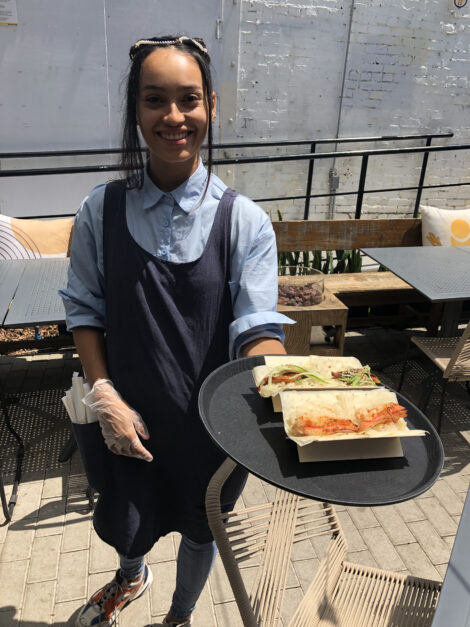
Edobox offers modern Japanese food packed into well-designed bento boxes. Everything about the restaurant is contemporary, environmentally sound and thoughtful. A small kitchen building and a street-side sake bar sandwich the main dining patio. All seating is outdoors. All service, by waitstaff.

Server at Edobox

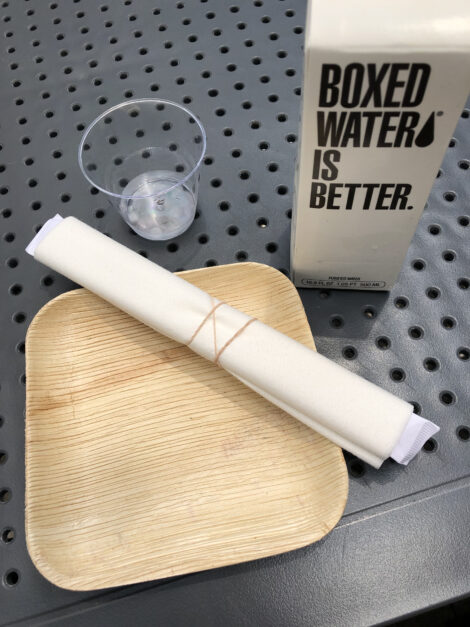
All service ware—including utensils, plates, bento boxes, etc.— are either compostable, recycable or reusuable.

Service setting.

And all food is beautifully packed for eating on premise or takeaway. (Just a reminder that the beach is steps away and Edobox bento boxes make for super-chic picnics.)

I like the DESIGN and DECOR. 

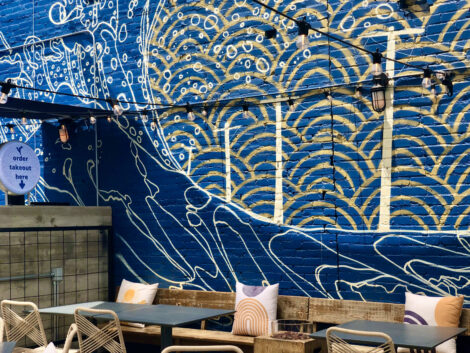
The small kitchen building at the back of the space wears a deep, ocean-blue paint. White paint covers one of the two long brick walls that define the patio dining area. The other wall sports a sea-blue background splashed with swirls of sunshine-yellow scallops, and white floating bubbles and foamy waves.

Painted brick wall at Edobox

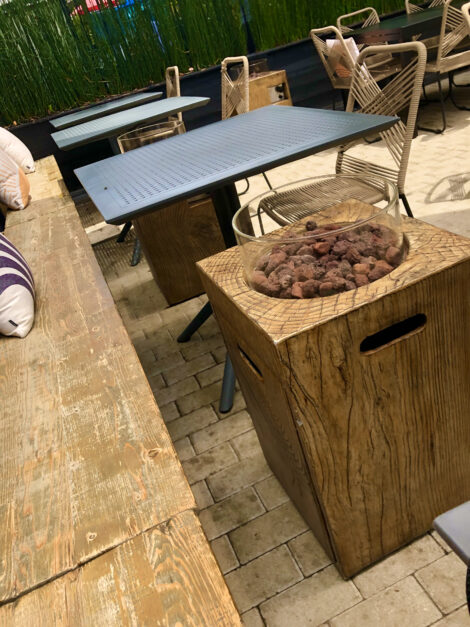
Wood benches and beige woven-back chairs surround black metal tables. Throw pillows pick up dashes of yellow and black. And wood-colored, block heaters fitted with lava rock add pizzaz as well as warmth on cool nights.

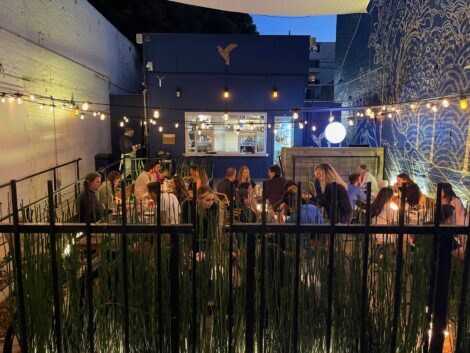
When the sun goes down, overhead string lights shed a mellow glow over both patio and bar.

Night on Edobox's Main Patio

Day and Night Edobox bar

Day and Night at Edobox’s Street-side bar.

The entire ambiance feels sophicated and stylish, creative and comfortable.

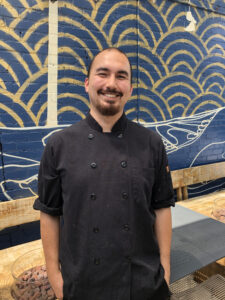
Edobox Chef/Partner Carlos Couts

Edobox Chef/Partner Carlos Couts

But most of all, I’m mad about the FOOD.

Oh my. Terrific doesn’t quite cover it—but then I am prone to raving about perfectly cooked and beautifully served bites of pure delight.

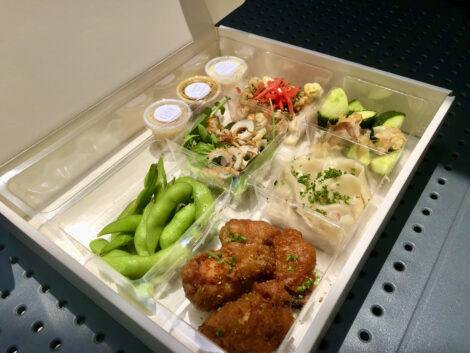
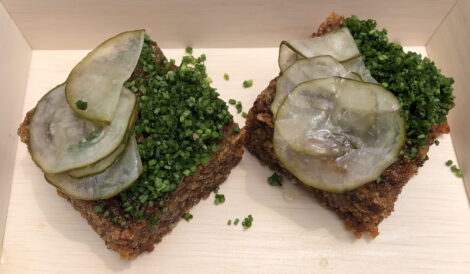
The menu offers a choice of chef-designed bento boxes. The Vegan Bento features wild mushroom onigiri for $20; The Tono Bento contains Japanese fried chicken kaarage, dry aged Flannery Beef dumplings and wasabi fried rice for $30; and the Edo Bento adds black cod to the dumplings and fried rice for $35. All of the boxes come with spicy cucumber salad, edamame and an Edobox house salad (we scored the salad recipe—see below).

The Tono Bento Box

The Tono Bento Box


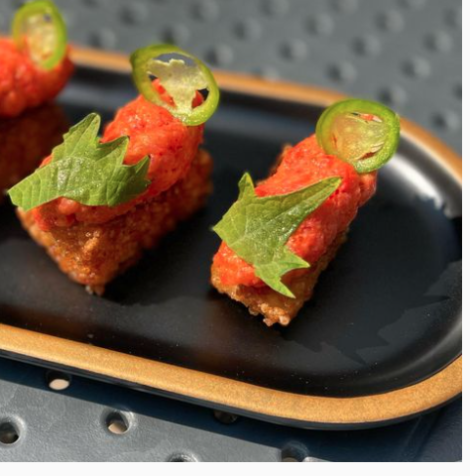
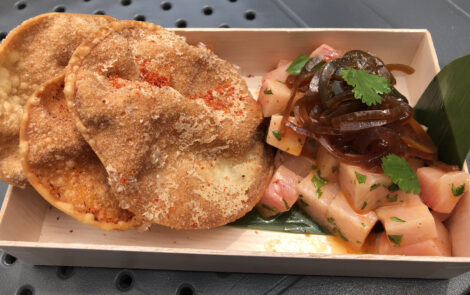
Of course, diners can order al la carte from the menu, which showcases such delights as sushi, nigiri, sashimi, tacomaki, rock shrimp tempura, Miyazaki Wagyu steak, spicy pork mazeman ramen and 

Toro Crispy Rice

Toro Crispy Rice


Hamachi Ponzu with Chile Toreados

Hamachi Ponzu with Chile Toreados


Mushroom Onigiri

Mushroom Onigiri

As to beverages, draft saki and beer, wines and sake-based cocktails join non-alcoholic waters, juices and ginger-lemon soda and Vintage cola.  Edobox is “corkscrew free” so all beverages, incuding cocktails, are packaged to be opened without a tool.

California climate, Covid-conscious outdoor dining and drinking, captivating food, creative atmosphere, congenial staff—that’s Edobox. As I said, a classy favorite!  For opening hours, location, menu and up-to-the moment information, click HERE.

For a home-made taste of Edobox, see:

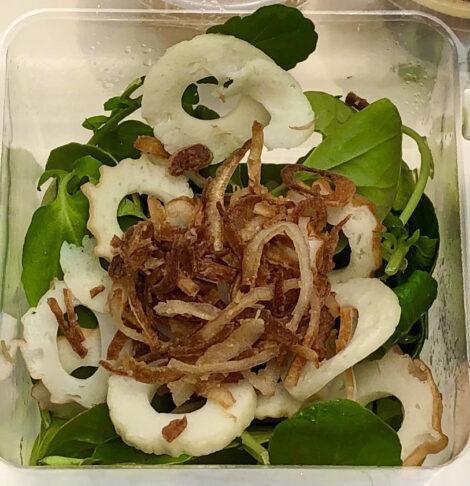
EDOBOX HOUSE SALAD 

 Yield: 4 small side servings.Edobox House Salad

(Please see NOTES below for ingredient descriptions.)

8 ounces watercress, rinsed and patted dried

Miso Aioli to taste (recipe follows)

3 dashes wasabi oil (or transfer oil to an oil sprayer and use 3 sprays)

3 ounces chikuwa, thinly sliced

1 tablespoon fried shallots (recipe follows)

1 tablespoon tempura flakes

Put watercress in a serving bowl. Toss lightly with miso aioli. Spray with wasabi oil.   

Sprinkle chikuwa, fried shallots and tempura flakes over top.  

MISO AIOLI DRESSING

Yield: 1 cup dressing.

1/2 cup Saikyo miso

1/2 cup Kewpie mayonnaise

3 tablespoons fresh squeezed lemon juice 

Put miso, mayonnaise and lemon juice in a bowl and stir until well blended.

Refrigerate until ready to serve.

FRIED SHALLOTS

Shallots

All-purpose flour

Vegetable oil

Salt 

Peel and trim shallots. Cut shallots into thin slices. Toss slices in flour. 

Heat enough oil to cover shallots in a skillet. When hot, add the shallots and fry until crispy. Drain on a paper towel. Sprinkle lightly with salt. Set aside to cool completely.

NOTE: INGREDIENTS

Saikyo miso is a pale—yellowish, mild, high-quality, somewhat sweet miso paste. 

Kewpie mayonnaise is a sweet, eggy mayonnaise with hint of umami. 

Wasabi oil is a vegetable oil seasoned with wasabi horseradish.

Chikuwa is a Japanese seasoned fish cake product cooked on rods resulting in a  tubular shape. 

Tempura flakes are crispy bites of deep-fried tempura batter.  

Most of the Japanese products called for in this recipe can be purchased from specially food markets or online. Some can be made at home. (Check online or a great, Japanese cookbook for recipes.)

Sunshine motif on throw pillow at Edobox.


BUSCUITS, CHUCK WAGON COOKING AND BUFFALO BILL CENTER OF THE WEST

Talk about great museums.  The Buffalo Bill Center of the West, located in Cody, WY,  is as good as as it gets.

Buffalo Bill Center of the West

The facility actually holds five separate museums: one devoted to Buffalo Bill, Annie Oakley and artifacts from the American West;

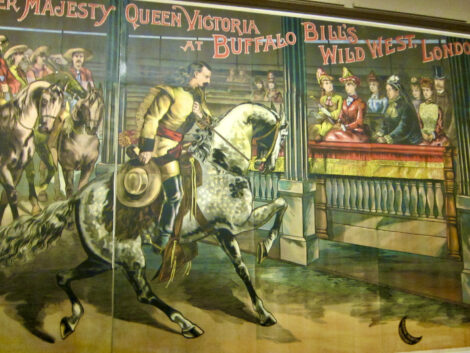
Poster of Buffalo Bill greeting Queen Victoria

one focused on the Plains Indians;

Statue of Native American

one features Western artists;

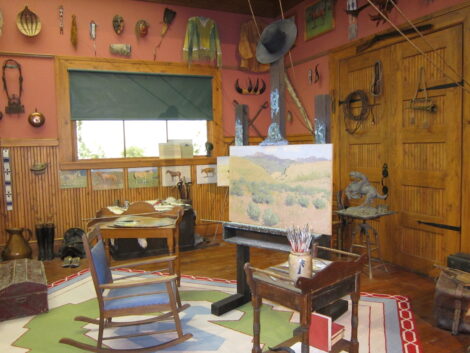
Artist studio in the Buffalo Bill Center of the West

and the two others showcase natural history and firearms. 

Buffalo scene in the Buffalo Bill Center of the West


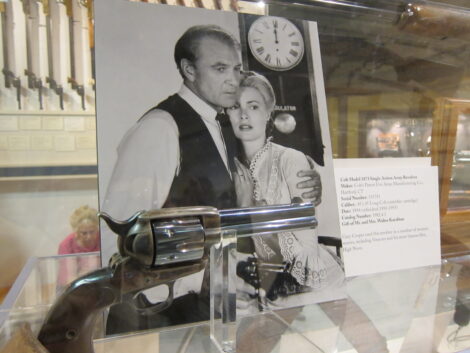
Gun from movie High Noon on display in the Buffalo Bill Center of the West

Oh so much to see. So much to learn. So much to value. 

Cody Firearms Museum.However, despite the importance and educational scope of the organized exhibits, what I loved most about the whole complex sits on the lawn, outside the front door. 

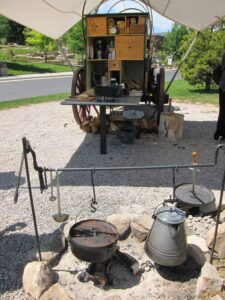
The Center hosts chuck wagon cooking, giving viewers an edible example of home on the range—without a range—the type cooking from cattle drives and covered wagon days.

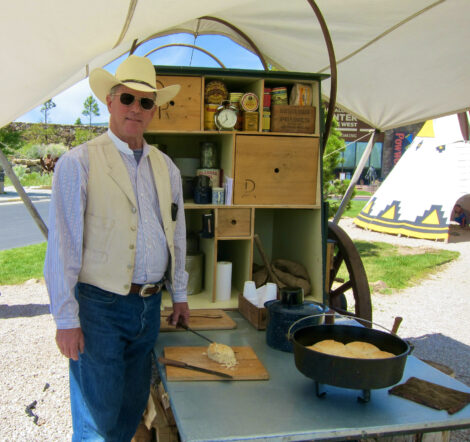
Loved the stories and history of the chuck wagon—as told by Fred Breisch, volunteer cowboy cook and retired pilot for United States Steel Corporation, and I loved the casual “cooking class” that Fred conducted. He explained how to cook the biscuits on an open campfire, and also told me how to bake them in the oven of my home kitchen.

Fred Breisch cooking at The Buffalo Bill Center of the West.

Fred Breisch cooking biscuits.

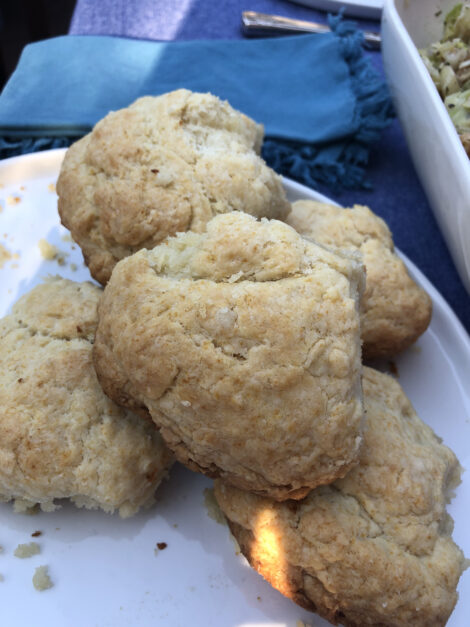
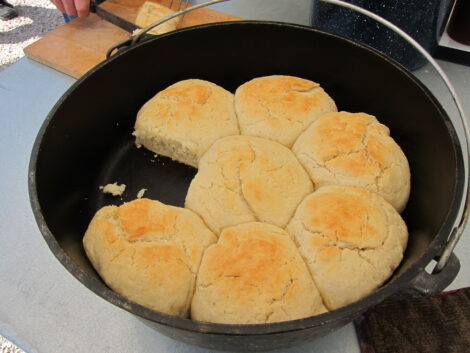
I opted for the latter cooking method and now have found something that I like even more than the museum complex and it’s outdoor chuck wagon experience—-I love love love the biscuits.

DUTCH OVEN BISCUITS

(Recipe from The Buffalo Bill Center of the West)

Yield: 8 to 10 biscuits.Biscuits cooked in a Dutch oven.

Shortening (lard is best, but Crisco will work)-16 tablespoons for biscuit dough and more for greasing Dutch oven

4 cups all-purpose flour plus additional flour for kneading dough

2 teaspoons baking powder

1 teaspoon salt 

1 to 1-1/2 cups milk or water

If cooking over and open fire, start preparing fire before mixing biscuit dough.

If cooking in a conventional oven, preheat the oven to 400°F.

Generously grease bottom and up 2 -inches of side of a 12-inch cast iron Dutch oven.

Put 4 cups flour in a large mixing bowl. Stir in baking powder and salt. Drop 16 tablespoonfuls of shortening in different places over top of flour. With your finger tips, rub shortening into flour until mixture is in coarse crumbs. (Don’t over work mixture.) Distribute 1 cup milk over top of flour mixture and stir with a wooden spoon, adding more milk as needed, until mixture forms a sticky dough. Sprinkle dough with flour and knead lightly, adding more flour as needed, until dough is smooth and not sticky. (Try not to handle the dough too much. The lighter the touch, the lighter the biscuits.) Pinch off tennis ball size pieces of dough and flatten to about 1/2-inch thick rounds. Put rounds in greased Dutch oven; the biscuits can be touching, but not tightly packed. 

To cook over an open fire: 

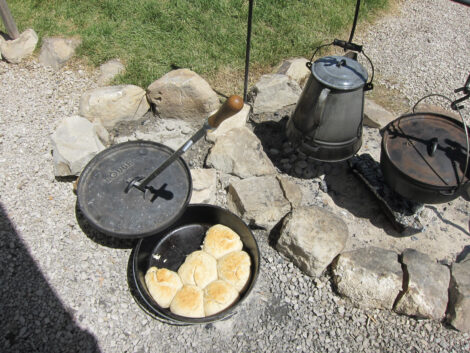
Biscuits cooked over and open fire.

Light about 21-25 pieces of charcoal.

When charcoal briquettes are covered with white, arrange 7 pieces of charcoal in a circle on your fire surface. Set Dutch oven above charcoal circle—almost but not quite touching hot coals. (The oven needs to be just above the coals. If your Dutch oven does not have legs, you can rest the oven it on a rack above the coals or on bricks or stones so that the bottom does not sit directly on the coals.)

Put lid on Dutch oven and arrange about 14 pieces of hot charcoal in a circle on lid. Let cook for about 10 minutes,  Lift oven, rotate it a quarter of a turn and replace above hot coals. Rotate lid a quarter of a turn in the opposite direction of the turn you gave oven. Continue cooking about 20 minutes more or until biscuits are golden brown, rotating oven and lid once or twice, while cooking.

Biscuits cooked outdoors over open fire. 

To cook in an oven: 

Place Dutch oven in a preheated 400°F oven, and bake, uncovered, until biscuits are golden brown, about 30 minutes. 

For more information about the Buffalo Bill Center of the West, click HERE.

For more information on Cody, WY, and a fabulous recipe for a mojito margarita click HERE.

Man on horse statue from The Buffalo Bill Center of the West


MOLLY WELLMANN, JAPP’S, HEMINGWAY DAIQUIRI

Molly WellmannWhat a spark! What a charmer! What pizzazz! 

Molly Wellmann is bar none the most spirited woman I know. And it’s not just because this Cincinnati local won the Nightclub and Bar Media award for Best Bartender/Owner in the Nation and that Bon Appetit magazine says her bar is the best in Cincinnati or that she penned an ultimate cocktail tome Handcrafted Cocktails. Its more because of her intoxicating personality, buzzy charm and extravagant mix of interests.

The “Bar Queen of Cincinnati,”as Molly is affectionally known, owns Cincinnati’s heavily awarded bar, Japp’s, located on Main Street, in the heart of Cincinnati’s historic Over-the-Rhine neighborhood. 

The bar started life in 1879 as a wig shop owned by a fellow named John Japp. The property flowed through several owners, some decline and various reincarnations before Molly took over, opening Japp’s in 2011 and making the bar a Cincinnati favorite.

Sign Japp's

Schooled in nutrition, Molly is a self-taught mixologist, history buff and consummate storyteller. She confesses an obsession with not only “Old World” cocktails made between 1700s and 1950s, but also the stories behind them. Molly said that making a cocktail is like painting with flavors and that she loves telling people the stories behind their cocktail so that people get an “experience” and not just a drink.

She uses old fashioned classic cocktails as a base for invention, mixing, stirring, shaking, pouring only the highest quality ingredients in her cocktail updates.

Collage of colorful cocktails.

Not one to lounge around during Covid closures, Molly shot 5 O’Clock Tales, a series of short videos with cocktail stories and recipes to run on her social media outlets. She developed the series, as she said, to avoid going stir crazy (pun intended) and as a fund-raiser for her bar staff while Japp’s was Covid closed. People can pick up cocktail “kits” from Japp’s to make the 5 O’Clocktails at home, or can just follow Molly’s advice and use their own home stash. 

HEMINGWAY DAIQUIRI (Recipe from 5 O’Clock Tales)

Yield: one serving.Molly Wellmann making a Hemingway Daiquiri

1-1/2 ounce Bacardi four-year-old rum

1 ounce fresh squeezed grapefruit juice

1/2 ounce maraschino liqueur

1/2 ounce fresh squeezed lime juice

Put rum, juices and liqueur in a cocktail shaker. Fill shaker with ice. Shake vigorously. Strain mixture into a tiki cup filled with ice. Add a straw. 

Tune in HERE   to see some of the cocktail segments as well as  some of Molly’s wild and unique dressing choices.


Click HERE to learn more about Molly. 

Click  HERE to buy a copy of Handcrafted Cocktails: The Mixologist’s Guide to Classic Drinks for Morning, Noon & Night from Amazon (disclosure, I may make a commission from the sale).

Cover of Handcrafter Cocktail's book.


SUNSHINE INN GARDEN OF EDEN SALAD

It’s been my favorite salad for at least 50 years. Through thick and thin; through Nouvelle, Fusion, California and New American Cuisines; through fast food, slow food, farm-to-table, ethnic and international cooking movements, I have loved the Sunshine Inn salad above all others. My sort of comfort food. My family thinks so as well.

The Sunshine Inn first shined bright light on the St. Louis public when it opened as a vegetarian restaurant in 1974. This was the city’s one and only “health-food” restaurant and it thrived, which was a bit surprising as St. Louisans loved their hamburgers, steaks and barbecue pork above all else.

My family relished the restaurant and we went often.  My daughter always ordered a rice bowl with assorted veggies and melted cheese. My husband shopped the menu, ordering a Golden Lion (vegetarian burger) one week—a stir fry the next. I fell in love with The Garden of Eden salad at first bite and never strayed.

When the restaurant closed in April 1998, I started making the salad at home and have made it happily ever after. 

The Sunshine Inn served the salad piled in layers on a large plate. It offered several salad dressings, with the Creamy Sesame and House the most popular. 

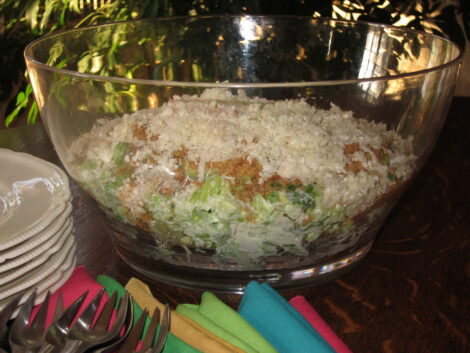
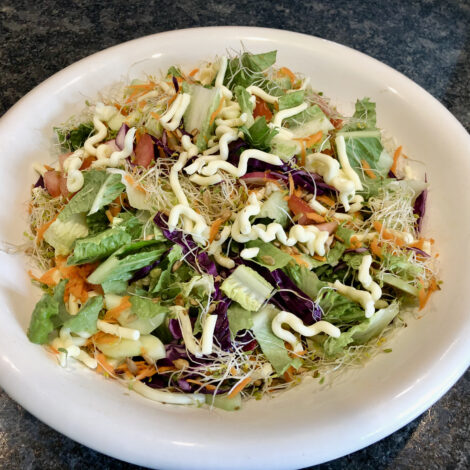
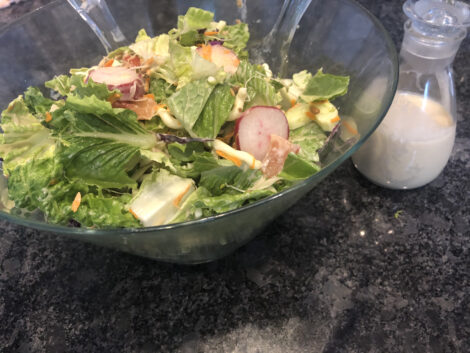
When making the salad at home, I first put a generous amount of lettuce in a large salad bowl then sprinkle other vegetables on top, ending with the alfalfa sprouts, sunflower seeds and cheese.

Sunshine Inn salad in large white bowl.

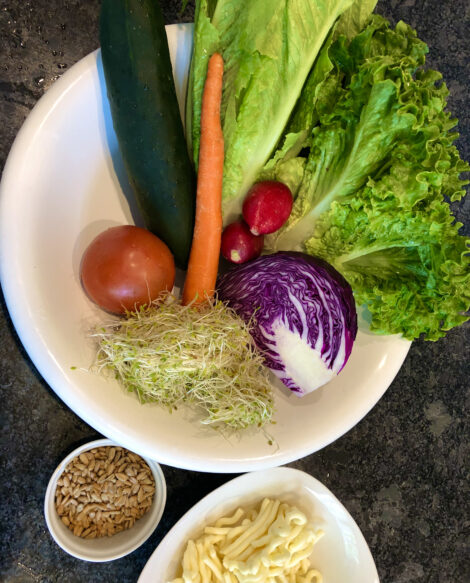
The dressing, sprouts, sunflower seeds and, of course, lettuce are a must to capture the essence of the Sunshine Inn salad, so be sure to include them, otherwise do your own thing, leaving out any ingredient that you don’t fancy and gauging proportions to suit your own taste.

I like the salad lightly dressed, others prefer it drenched, so I toss it with a minimal amount of dressing and serve extra on the side.


GARDEN OF EDEN SALAD

A mixture of leaf and iceberg lettuce cut into bite-size pieces

Slivered red cabbageSunshine Inn salad ingredients

Peeled and seeded cucumber, cut into bite-size pieces

Grated carrot

Sliced radishes 

Trimmed and chopped tomato

Slivered red onion

Alfalfa sprouts 

Sunflower seeds

Shredded cheese (The restaurant used mozzarella or white Cheddar; my family likes St. Louis provel.)

Put lettuce in a large salad bowl. Top with remaining ingredients in the order stated. 

Drizzle a light amount of dressing over salad just before serving and toss gently. Serve additional dressing on the side.

Refrigerate leftover dressing in a covered container and use within a day or two from making.


CREAMY SESAME DRESSING

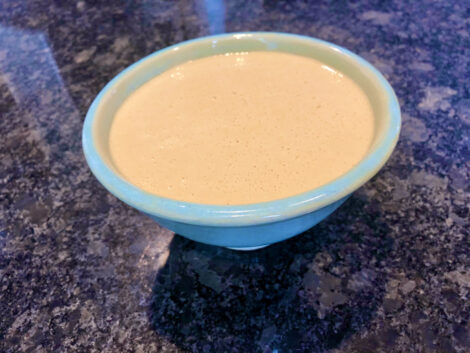
Yield:  2-1/3 cups.Sunshine Inn Creamy Sesame Dressing

3/4 cup orange juice

1/2 cup tahini

1/4 cup tamari

3/4 cup vegetable oil

Put juice, tahini and tamari in the jar of a blender. Turn blender to high and slowly add oil, emulsifying mixture. Use immediately or refrigerate in a covered container and use within one or two days.


SUNSHINE INN HOUSE DRESSING

Yield:  2-1/3 cups.Sunshine Inn House Dressing

1/4 cup fresh lemon juice

2 tablespoons plus 2 teaspoons apple cider vinegar

1-1/2 tablespoons tomato juice

1/2 tablespoon honey 

1/2 small onion, peeled and chopped

1 small tomato, trimmed and chopped

3/4 cup parmesan cheese

3/4 cup vegetable oil

Put lemon juice, vinegar, tomato juice, honey, onion, tomato and cheese in the jar of a blender and process on high until ingredients are well blended. While blender is on high, add oil in a slow steady stream, emulsifying dressing. Use immediately or refrigerate in a covered container and use within one or two days.

Garden of Eden Salad


CAFE NOVA SPANAKOPITA

KATERINA SHESHI

Cafe Nova

St. Louis, Missouri

Katerina Sheshi at Cafe Nova

Katerina Sheshi at Cafe Nova

Born and raised in communist Albania, Katerina Sheshi knows about oppression and hard work. She learned to cook from her mother and expanded her skills during her formative years by working in restaurants watching the “good cookers” who ran them. Katerina became such a proficient cook that the government put her in line to head a restaurant, but first required her to take the state’s four-year study program in restaurant management.

Eventually Katerina married, had a daughter and won the prestigious position of overseeing three large factory restaurants. 

She worked hard. With only one helper, Katerina cooked breakfast, lunch and dinner for 200 factory workers. Although she earned a salary, under communism she had to turn it back to the government. “I didn’t own the place,” she said. “I didn’t own nothing.”  She wanted more for herself and her family which meant escaping from the regime. So after much secret planning, Katerina, her husband and daughter left in the dark of night and, with only belongings that they could carry, trekked across the Mali i Thatë mountains into Greece. 

Katerina continued to cook in restaurants in Athens with more freedom than in her homeland, but it still wasn’t enough. Believing America was the land of opportunity, Katerina and her family immigrated to the United States in 1993, landing in St. Louis, Missouri.

She took classes to learn English and pass her American citizen exam while raising a family and working in various Greek restaurants. 

In 2010, she fulfilled her dream of owning a small coffee cafe.

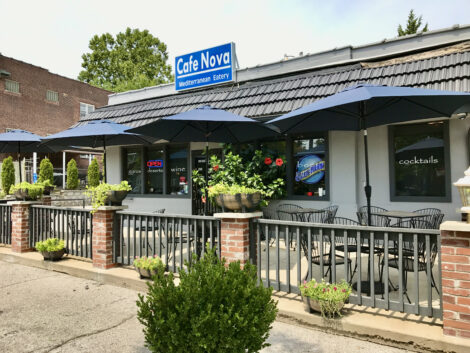
Outside of Cafe Nova

Today, Cafe Nova, Katerina’s  mediterranean restaurant, is a popular meeting place for Albanian immigrants and locals who gather to enjoy good company and favorite dishes. 

Inside Cafe Nova

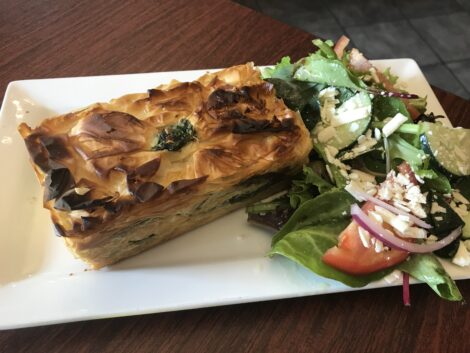
Katerina’s menu includes a blend of casual Albanian and Greek dishes such as lamb shank and gyros, but it’s her spinach pie that wins highest accolades and is the cafe’s best seller. 

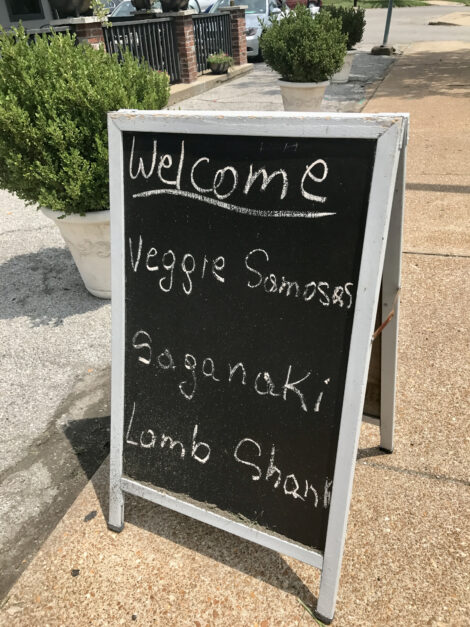
Daily Specials at Cafe Nova

Called Byrek Mi Spinaq in Albania and Spanakopita in Greece, spinach pie is a popular mainstay in the cuisines of both countries. As expected, Katerina does a bit of her own thing in the Cafe Nova’s version. Instead of buttering sheets of filo dough and laying them flat to make layers, Katerina scrunches the dough into airy puffs before adding them to the pan. The baked results are pies with flaky, crispy peaks that add a butter-rich crunch to the flavorful spinach and cheese filling.

SPANAKOPITA


Spinach Spanakopita as served at Cafe Nova

Albanian spinach pie

Yield: 4 servings.

3 tablespoons olive oil

1 red onion, peeled and diced

Salt to taste

2 cloves garlic, peeled and minced

3 cups finely chopped, blanched spinach (or frozen chopped spinach, thawed and well drained)

3 eggs, beaten

1 cup feta, crumbled

3/4 cup ricotta 

1/4 cup grated Parmesan cheese

Pepper to taste

About 12 tablespoons butter, clarified (See NOTE)

1 (16 ounces) package filo dough

Put oil in a large skillet set over medium heat. When oil is hot, add onion, sprinkle with salt and cook until onion is translucent, but not brown, about 8 minutes. Add garlic, and cook, stirring,1 minute. Gradually stir in spinach, and cook, stirring often, until liquid evaporates and spinach is “dry,” about 5 minutes. Transfer mixture to a bowl and set aside to cool. When cool, stir in eggs, feta, ricotta and Parmesan. Sprinkle with salt and pepper and stir until ingredients are well combined. Refrigerate in a covered container until ready to use.

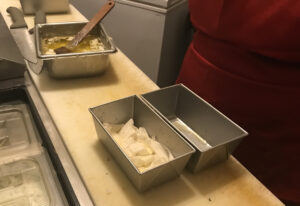
Scrunching filo dough to layer in panTo construct the spanakopita (see NOTE): generously brush bottom and sides of four mini loaf pans (about 5-1/2 X 3 X 2-1/4) with clarified butter. Working quickly and using a half of a sheet of filo at a time, gather filo into a loose bundle and gently put in one side of bottom of one pan. Repeat with a second half sheet of filo, putting it next to the first in in pan. Using a pastry brush, dot ruffled filo with clarified butter. Repeat the process, building a layer of 8 to 10 half sheets of ruffled filo and dotting with butter after each two-half sheets addition.

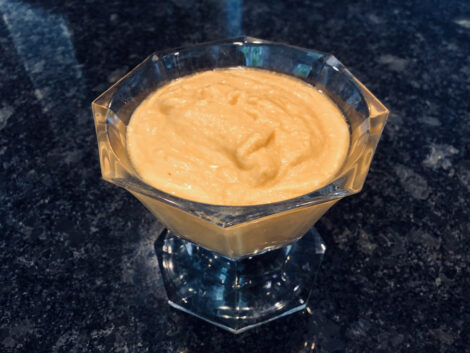
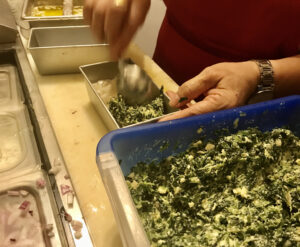
Spinach Filling for Cafe Nova SpanakopitaDivide spinach into 8 equal portions. Gently spread 1 portion over top of ruffled filo in pan.Top spinach with another layer of about 8 half-sheets of ruffled filo, each two-half sheets dotted with butter. Spread another portion of spinach over second layer of filo.

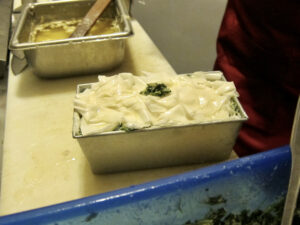
Top with last layer of filo (using about 4 to 6 half sheets filo), mounding filo above pan and drizzling with butter between the sheets. As you dot with butter, gently tap filo down into sides of pan, but do so lightly as you want air between the sheets.

Spanakopita ready for the oven at Cafe NovaRepeat process, layering ingredients as described above, into remaining three loaf pans.

Cover pans with plastic wrap and refrigerate several hours or overnight.

When ready to bake, preheat oven to 350°F. 

Put chilled pans in oven and bake until top is deep golden brown, 30 to 40 minutes.

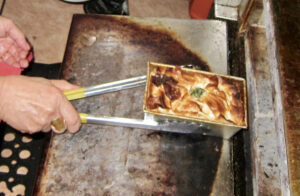
Turn cooked spanakopita out of pan onto a board or plate. Removing baked spanakopita from oven at Cafe Nova(if necessary, cut around edges of pan with a sharp knife to release the spanakopita).  With tongs, turn the spanakopita right side up and serve. 

NOTE: TO CLARIFY BUTTER

Put butter in a small saucepan and set over low heat. Without stirring, heat butter until it melts, foams and bubbles. Remove saucepan from heat and set aside for 5 minutes. The butter will separate into three layers—a top foamy layer, a middle clear layer and milky residue. With a spoon, carefully skim off top foam (set aside for another use). Pour the clear (clarified) butter into a small jar, discarding the milky residue.  Refrigerate excess clarified butter in a covered jar and use in a variety of dishes.

NOTE: FILLING PANS

Each pan of spanakopita has five layers of ingredients. First is a layer of ruffled filo sheets, each dotted with butter. The second layer is the spinach mixture. Third is another layer of ruffled filo sheets and butter. The fourth layer is another portion of spinach mix. The top layer is ruffled filo with butter.

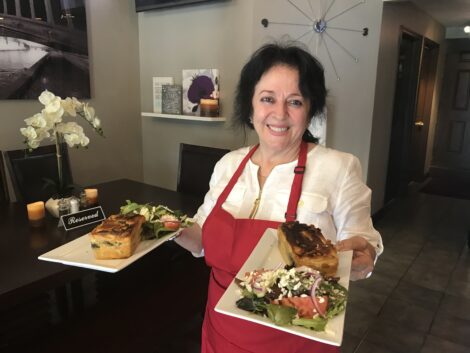
Katerina Sheshi holding Spanakopita at Cafe Nova


Sweet Leisure has other terrific immigrant chef restaurant recipes:

For Lona Lil Eats dumpling recipe, click HERE.

For Kobee-factory’s kobee recipes, click HERE.

For Yucas Hut’s cochinita pibil recipe, click HERE.


TIM BRENNAN, CRAVINGS AND BANANA BREAD

Tim Brennan

Tim Brennan

Tim Brennan knew what he was doing when he named his bakery/cafe “Cravings.” Anyone who samples his offerings is apt to develop cravings. I crave his lemon bars and chocolate raspberry-filled cake. (Oh my, craving is such a humble word for this heart’s desire.) A fellow cooking colleague says nothing compares to Cravings’ carrot cake with caramel pecan filling, and another colleague raves about Tim’s  rustic apple pie. The James Beard Foundation declared two of Cravings’ desserts “Best Dessert in the Midwest.” Tim’s Hazelnut Zuccotto took honors in 1993 and his Lime-Blueberry Bombe won the award in 1995. Pies, tarts, cheesecakes, cookies, roulades and towering layer cakes. Everyone has a favorite.

Cakes seen through Cravings window.

Whole cakes from CravingsCakes from CravingsCut cakes from Cravings

And we haven’t even mentioned the savory delights served in Cravings Restaurant or through Tim’s catering company which have their own claim to fame. I’ve been a fan of Tim’s for many years and have interviewed him in the past. He told me that he is one of eight kids and that his mother made desserts every night of his growing up. He mentioned that he started baking when he was a graduate student in Ireland during a postal and phone strike; baking helped him feel close to home when home couldn’t be reached by traditional methods. He said that returned to St. Louis and went from teaching to wholesale baking in a Croatian church kitchen before opening Cravings at 8149 Big Bend in Webster Groves, Missouri, in 1993. The small and charming Cravings bakery/cafe delights happily ever after.

Inside Cravings Restaurant

Inside Cravings

We asked Tim for a 2021 update—and let him answer in his own words. We also asked him to share a favorite recipe. Here are his replies?

Q: Has your philosophy of baking changed through the years? Seems you started out with such popularity that you didn’t need to change much to succeed? 

A: My philosophy has always been to narrow the gap between the visual expectation and the actual taste. More simply put, food needs to taste good! What our culture offers is much more superficial and concerns itself with the appearance: think of strawberries heavily glazed in something artificial. It attracts the eye but then lets you down when you taste it. I never want my food to disappoint.

Lemon Bars and Turtle Cheesecake Brownies

Lemon Bars and Turtle Cheesecake Brownies

Q: Cravings has so many fans devoted to special items, How do you decide what keep on the menu and what to add to keep the creative juices flowing?

A: Initially it was difficult to make any changes. Some customers eat exactly the same dish every time they come to Cravings; others are in constant pursuit of what’s new and different. It took time to strike the right balance. In the restaurant I devoted weekend specials to new and different ideas without really changing the staples. Oddly enough, the pandemic has provided greater opportunity to experiment with a wider range of cuisines and at the same time forced my hand to prepare dishes that reheat well and still taste great.

Q: Have you found peoples craving for sweets has changed during the Covid lock-down. Are they more after comfort or the exotic?

A: In the initial panic stage people craved comfort food: chili, potpie, brownies and such. As lockdown ebbed and flowed, people wanted GOOD FOOD for a consistent and dependable source.

Individual pieces of cake on a tray.

Q: How have you and Cravings adapted to Covid?  What do you see for the near future?

A: I’ve had to re-create myself. The newest version is Zoom cooking & wine pairing  classes. With advance registration, each participant receives the prepared food with heating instructions, the recipes and a live 1-1/2 to 2-hour instruction by me.  I love it. Yet with that brief class about 25- 35 hours of behind the scenes work.  I’m working harder than I did as a start up. Wine pairings include the prepared food, samples of all wines and a discussion with both me and the wine rep talking about our respective fields. Fun and educational!!

Tim whipping cream

Catering was non existent.  Weddings have been postponed or shrunk to 10-20 guests vs. 200-300.  People weren’t entertaining. But now some small wedding cake orders are trickling in and so are a few tiny catering events. We don’t know the pattern, so we have to keep our fingers on the pulse of our customer. I personally take 90% of all takeout orders to cars so I have at least some interaction with those who really care about my business. This sustains and revitalizes me.

Q: What do you think about the baking shows on TV? Style without substance—or setting trends?

A: I’m usually annoyed by them because they create a false environment with unrealistic time deadlines or odd/bizarre ingredients. They also raise unrealistic expetations of the consumer which we, in the industy then have to respond to. “Reality” should be changed to “phoney” TV. Not a fan!

As for trends, I have been looking to both the east and west coasts for decades. I love to travel and take lots of notes especially about the food and then try to research and recreate my own versions of it. I purposely avoided following trends because I viewed myself as  more traditional.  Now I watch those trends with one eye ( e.g. Christina Tosi’s “naked cake” which I really think is a result of a lack of the skills to professionally frost one! Haha)  Essentially, I’ve embraced this business as a extension of me. I let my personal tastes guide me.

Q: Of all of your recipes, what stands out as your favorite?

A: I’m frequently asked about my favorite dessert.  My answer remains the same:  I don’t have to decide. If there’s something I’m craving, I simply make it. My ideal dessert would include all of these: crunchy, chewy, creamy, melt in your mouth….sweet, a bit of salt.

Q: Will you give us a recipe that fits your description of the ideal dessert?

A: Walnut Marjolaine with Cappuccino & Strawberry Mousse, Chocolate Ganache & Walnut Brittle fills the bill, but it takes from 18 to 25 hours to make and would be too complicated and frustrate many bakers.

Piece of Walnut Marjolaine with Cappuccino & Strawberry Mousse , Chocolate Ganache & Walnut Brittle

Walnut Marjolaine with Cappuccino & Strawberry Mousse , Chocolate Ganache & Walnut Brittle

I think it best to send you something simple and failproof. My banana oatmeal bread.

CRAVINGS’ BANANA OATMEAL BREAD

(Recipe supplied by Tim Brennan)

Yield: Two 8” X 4” loaves.

Butter and flour to prepare pans

6 ounces unsalted butter for batter

Individual Banana Bread

Individual Serving of Banana Bread topped with Cravings icing.

2-1/4 cups granulated sugar        

3 large eggs      

About 2-1/4 cups mashed ripe bananas   

1/4 cup buttermilk

1 tsp pure vanilla extract        

1-3/4 cups cake flour        

1-3/4 cups rolled oats  

1 tsp baking powder

1 1/2 tsp baking soda        

1/2 tsp kosher salt

Butter and lightly flour two 8” X 4” X 2” bread pans. Heat oven to 325°F.

In a large mixing bowl, with electric mixer, cream butter and sugar together until soft and well blended. Beat in eggs one at a time, scraping the bowl thoroughly after each addition. 

In a seperate bowl, mix the bananas, buttermilk and vanilla until well blended and set aside. Put flour, oats, baking powder, baking soda and salt in a third bowl and mix until well blended.

Add 1/3 of dry ingredients to butter mixture and stir until blended. Stir in 1/3 of banana mixture. Scrap the bowl after each addition. Continue alternating and scraping until all ingredients have been added.

Divide between the two prepared pans. Place pans in the preheated 325°F oven and bake until center of bread springs back when lightly touched, 35 to 50 minutes. Cool for 10 minutes and then invert on a rack to cool completely. 

Serve with additional butter.

Poster inside Cravings


For more information about

Cravings click HERE.

To sign up for Cravings’ online cooking classes click HERE. 

To follow Tim on Facebook click HERE.

To sign up for Cravings’ daily menus click HERE. 


PIZZA BIANCA. PIZZA ROSSA. PIZZA PERFECTION.  

Mark Katzman holding pizza.Lo and Behold—my photographer son, Mark Katzman, has started cooking. He’s not been interested before—and why should he have been, being married to a fabulous cook, Hilary Skirboll, who puts glorious meals on the table that would eclipse any effort on his part.

Nevertheless he is cooking, but not just cooking ordinary stuff—he’s going for the biggies.

I learned about this new interest about three weeks ago when he copied me on an email to Italian cooking maven, and cousin, Elizebeth Minchilli. He said that he was researching a recipe for a pizza bianca that they had enjoyed together at Rome’s famous Forno Campo de’Fiori. 

Pizza from Forno Campo de'Fiori

Pizza from Forno Campo de’Fiori

Then he called to ask if he could borrow my KitchenAid mixer. 

Then he called to ask my husband and me to dinner.

Then he presented us with two of the best pizzaz I’ve ever encountered. 

One was a pizza rossa–a “red” pizza with sauce.

One was a pizza bianca–a “white” pizza without sauce.

Pizza bianca

Both had a crispy, crunchy crust that was richly flavored, tender and tasty. Both were divine!

I had no idea how complicated Mark’s recipe was until he sent it to me.

He weighs all ingredients. He uses Italian products that he buys from an Italian speciality market. He has authentic equipment. Too much for me, but if you want to make the recipe, and if we are in the same town at the same time, I will drop anything I am doing and run over to your house for a taste test. It’s that good!

MARK’S PIZZA FORNO CAMPO DE’ FIORI

Pizza IngredientsYield: 2 pizzas.

500g Italian milled flour for pizza for the dough plus additional flour for shaping and baking dough (Mark uses Granoro “O” pizza flour.)

425g ice water

11g (a smidgen less than 2 teaspoons) salt

¼ tsp dry instant yeast (Mark uses Caputo brand.) 

Oil for oiling 4-quart container

  1. Combine: flour, 375 g of the water, salt and yeast in the bowl of an electric mixer fitted with a dough hook. Stir with a rubber spatula just until a rough dough forms. With the dough hook, mix on low (2 on a KitchenAid mixer) for 4 minutes. Turn the mixer to medium-high (8 on a KitchenAid mixer) and continue to mix, very slowly drizzling in the remaining 50 g water over the course of another 12 minutes. The dough will be very loose, almost liquid. Continue mixing for 3 to 4 minutes, until the dough comes together. Turn the mixer to the highest speed and mix until the dough pulls away from the sides of the bowl, another 2 to 4 minutes.
  2. Transfer the dough to a lightly oiled, clear 4-quart container with a lid. Cover and let stand at room temperature for 2 hours. 
  3. Refrigerate the dough for 18 to 24 hours.
  4. Remove the dough from the refrigerator and let sit on the counter to warm up, about 1 hour.A bowl of bubbling dough.
  5. About 1 hour before baking, place a baking stone on the middle rack of your oven. Preheat the oven to as high as it will go. Pour the dough onto a lightly floured countertop and very gently press into a rectangle measuring 6 by 20 inches. Use a bench scraper or sharp chef’s knife to cut the dough into two rectangles measuring 6 by 10 inches. Evenly and moderately dust each with flour and lightly drape with plastic wrap. Let rest 30 minutes.
  6. Line a pizza peel with parchment paper. Evenly dust with a good coat of flour using a sifter to make it even. Re-dust the top of one of the rectangles and gently transfer it to the peel turning it over so the floured side is down (this is a very sticky and wet dough. By keeping the bottom floured you will prevent it from sticking to the parchment and your fingers as you gently stretch it – add more flour as needed; try to only use what you need to stretch it without it sticking). Dimple the dough all over with your fingertips. Stretching pizza dough.Lift two corners of the rectangle from the peel, stretching it as you lift, and place it back down on the peel several times to stretch the dough to 12 by 18 inches (this is tricky and takes patience and practice. Move slowly. Do not stretch the dough larger than the peel. Try to make dough all the same thickness (paper thin areas will burn).  If you tear holes you can pinch them shut or patch them with excess dough. Pizza on pizza peel.
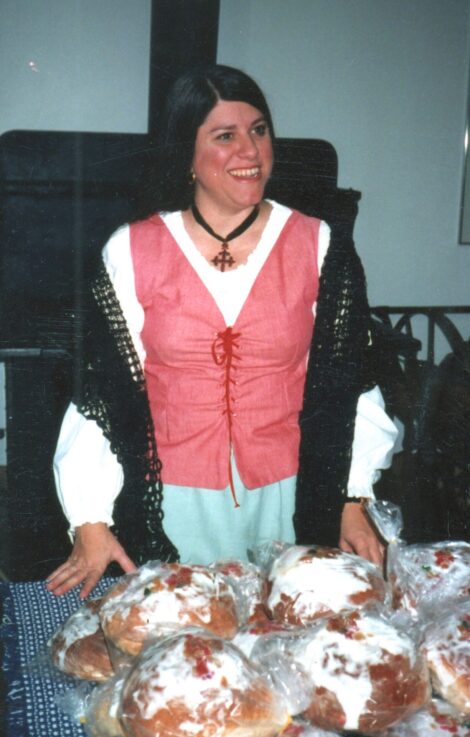
  7. Gently dimple the dough again. 
  8. Top the pizza as desired (see NOTE)
  9. Slide the topped pizza, still on the parchment, onto the baking stone. After 7 minutes use the peel to lift the pizza and remove the parchment. Bake until the pizza is bubbled and golden brown, about 15 minutes. Slide the pizza onto a cutting board. 
  10. Repeat with the remaining pizza. Slice and serve immediately. 

NOTE:

Mark topped his red pizza with a smear of rossa sauce (recipe follows), dots of sausage, mozzarella di bufala and broken leaves of basil. 

Oven Ready Red Pizza

He topped his white pizza with a drizzle of olive oil, strips of prosciutto, dabs of fig jam, cut fresh figs, a sprinkling of gorgonzola and rosemary.

Oven Ready White Pizza

Toppings on both pizza were added with a light touch. Toppings should not overwhelm the crust. 

ROSSA SAUCE

Yield: About 6 cups. 

2 (28-ounce) cans whole San Marzano tomatoes

¼ cup extra-virgin olive oil

4 garlic cloves, thinly sliced

2 sprigs basil

1 bay leaf

Salt to taste

¼ teaspoon black pepper

With an inversion blender, crush the tomatoes (not too much just to make an even, chunky sauce).

Set a large, straight-sided skillet over medium heat. Add oil. When oil is warm, add garlic and cook until just lightly golden, then cook 30 seconds more. Stir in tomatoes and juices, basil, bay leaf, salt and pepper.

Bring sauce to a simmer and simmers steadily until sauce is thick and tomatoes have mostly fallen apart, about 30 to 40 minutes. Remove sauce from heat and discard basil or bay leaf before using. 

To buy an authentic pizza peel, click HERE.

For a cocktail recipe from Mark, click HERE.

For another wonderful Italian recipe–this one from Elizabeth Minchilli, click HERE. 

Mark and Matt Katzman eating pizza.

Mark and Matt Katzman


BEAUTIFUL LIVING FROM CAL-A-VIE

Terri Havens

Terri Havens

I don’t know Terri Havens, but I am astounded by her creations.

Everything that Terri touches seems imbedded in splendor. 

I love the georgous Cal-a-Vie Health Spa that she and her husband own in the lavender-scented hills of Southern California. I adore the spa’s majestic setting, the flowers, the French antiques, the bedrooms, the public rooms—all perfection.

Distant view of Cal-a-Vie Health Spa.

Distant view of Cal-a-Vie.


Front door to bedroom and bedroom at Cal-a-Vie.

Door to bedroom and bedroom.

But what totally blows me away, is Terri’s new book, Beautiful Living: Cooking the Cal-A-Vie Health Spa Way. To call this piece of food art a cookbook underestimates the magic. Page after page of wonderful recipes, seductively photographed by Debora Smail, showcase beautiful food surrounded by table-top design elements that sets my heart aflutter. I rave. Who could not.

Cover of Beautiful Living book.

As I said, I don’t know Terri, but would sure love to know more about her, so I asked her some questions and she answered:

Q: How did you grow up that gave you a such a refined sense of style and beauty?

Terri A: I grew up in New Orleans which I feel had a profound influence on me. New Orleans has that old world charm with a huge French influence. The streets are labeled Rue, the streets are all French names and the buildings are all 150 years old! I was exposed to fabulous high ceilings, crown moldings cast from original designs in France, wrought iron, gas lantern medallions, all hand made by artisans that are groomed from generation to generation. I appreciate the craftsmanship that goes into every piece of furniture that is hand made. I pay particular interest in the details of curtains, trims, and fabrics all from my exposure of fabulous architecture and design growing up in New Orleans.

A French-style room with a tapestry backdrop.

Rooms at Cal-a-Vie are filled with French pizzazz.

Q: Cal-a-Vie is the essence of elegance and luxury, yet it’s not pretentious or forbidding. How did you strike that perfect balance

Terri A: I love to blend historic design for grounding reasons and a sense of place with modern luxury features and amenities. My kids taught me that. They were tired of not being able to sit in an 18thc chair. They begged to just have a comfortable chair to sit it. I started combining the two so that all could be happy. It works out much better like that. You need both form and function to get by these days.

Beautiful comfortable room at Cal-a-Vie.

A public room at Cal-a-Vie offers style and comfort.

Q: You even have a vineyard, Can you tell us a bit about it? How does wine fit in with a spa diet?

Terri A:  When the fires were constantly threatening Cal-a-Vie Health Spa we wondered if we could protect the property by getting rid of all of the brush on the mountainsides. It took lots of environmentalist working together, but we finally came to the conclusion grapes would be the best agriculture to work on our soil. They don’t use as much water as avocados or other fruits.  So, we planted 15 acres of grapes. Our original plan was to sell the juice as it wouldn’t fit in with the spa life.    Then, we started noticing lots of research on resveratrol’s benefits to the heart and other positive aspects of one drink in moderation. Not to mention we were constantly being asked for one glass of wine! So, we built a 200 year old Parish house in the middle of the vineyard to use for small wine tastings for guests who want them. 

Q: The 300-page Beautiful Living has more than 100 recipes, all beautifully photographed with style ideas. Can you tell me what inspired the book? How long did it take you to produce the book from conception to completion?

Terri A: The book started as a coffee table book about the beauty of the property. We spared no expense in the decorating of each room, exercise rooms, and kitchen. We had hand-tooled leather imported for the boxing bags. Our weight equipment is in a buttery leather and 18thc chandeliers hang in the workout rooms, etc. Everything we do at Cal-a-Vie Health Spa we do over the top luxurious. Our guests were constantly asking for a book to take home. So, we started with an award winning photographer to make sure the pictures were beyond amazing. Once we started shooting the property the chef said while you are at it we need a new cookbook. Guests are asking for that as well. I came up with the idea to combine the two. Since guests always want something to remember their amazing time at CAV, I thought the gorgeous pictures of CAV combined with delicious recipes would be a winning combination. The book took over a year to produce, but it was worth the wait. We won the Academy Awards of cookbooks with the Gourmand Best Cookbook Award. We continued to win every award in all of the biggies.

  • •2020 Gourmand World Cookbook Award
  • •2020 “IPPY” Medalist, Independent Publisher Book Awards
  • •2020 Benjamin Franklin Award Gold, Independent Book Publishers Association
  • •2020 Silver Addy, American Advertising Awards
Three dishes with recipes in Beautiful Living.

Three dishes with recipes in Beautiful Living.

Q: Would you choose one favorite recipe from the book to share with readers?     

Terri A:  I will give you a dessert since most people feel like they can’t have a dessert when eating healthy. That couldn’t be farther from the truth. It is all in moderation and using the right ingredients. This one will totally surprise you. Don’t tell your family or guest what they ate until after they give you compliments on how delicious it was! The secret ingredient is avocado, which is used as a base to give a creamy texture with a rich chocolate flavor for the ultimate decadent dessert. We love piping this into a beautiful mini-martini glass so you can have the proper amount without feeling deprived.

CHOCOLATE MOUSSE WITH SALTED ALMONDS

Yield: 4 servings.Chocolate mousse in mini-martini glass.

1 to 2 medium avocados

1 cup dark cocoa powder

1/2 cup honey

1/2 cup maple syrup

1 tablespoon vanilla extract

1 tablespoon grapeseed oil

1/4 teaspoon cinnamon 

Pinch of kosher salt

Salted almonds, optional garnish (recipe follows)

Put 1 and 1/2 avocados in the bowl of a food processor. Add cocoa powder, honey, syrup, vanilla, oil, cinnamon and salt. Turn processor on and blend for two minutes. Scrape down the sides and blend for another minute. If mousse is too thin, add the remaining half of avocado and blend well. Chill for at least 4 hours before serving. Sprinkle with chopped salted almonds if desired. 

SALTED ALMONDS

1/2 cup whole raw almonds

1/4 teaspoon kosher salt

1 teaspoon water

Preheat oven to 350°F. 

Combine the almonds, salt and water in a small bowl. Toss the almonds around until the salt and water have completely coated them. 

Place the almonds on a small baking sheet and bake for about 7 minutes. Remove from oven and let almonds cool. Chop almonds and sprinkle on top of mousse, if desired.


Table set for al fresco lunch at Cal-a-Vie.

Table set for an al fresco lunch.

To find out more about Cal-a-Vie, click HERE.

For a few reasons that Sweet Leisure thinks Cal-a-Vie is the world’s best destination spa, click HERE.  

To order Cal-a-Vie products including antiques and Beautiful Living, click HERE.

To order Beautiful Living from Amazon (where I may—usually not—receive a commission) click HERE.


Three style photos in Beautiful Living

Lovely photos by Debora Smail fill Beautiful Living.